
Mining outposts are the main way that players can get organics and other materials used to upgrade their base and craft equipment in The Alters.
While shallow deposits can give a good amount of their specific resource, they’re one-time use only.
Deep deposits, on the other hand, offer an unlimited supply—but they can’t be harvested by hand. That’s where mining outposts come in.
In this guide, I’ll walk you through the full process of collecting organics and other materials using mining outposts in The Alters, so you can stock up on everything you need as quickly as possible.
Whether it’s organics, metals, Rapidium, or other valuable materials, you’ll need a steady supply of these to build new base facilities, gear, and consumables.
Basically, you’ll always want a healthy stash on hand if you plan on making progress.
Step-by-Step: Collecting Materials with Mining Outposts
The whole process breaks down into a few main steps:
- Finding the deep deposit
- Placing the mining outpost
- Connecting the outpost to your home base
- Extracting the organics or other resource
Here’s a breakdown of each step:
Using the Polygonal Scanner to Find the Deep Deposit
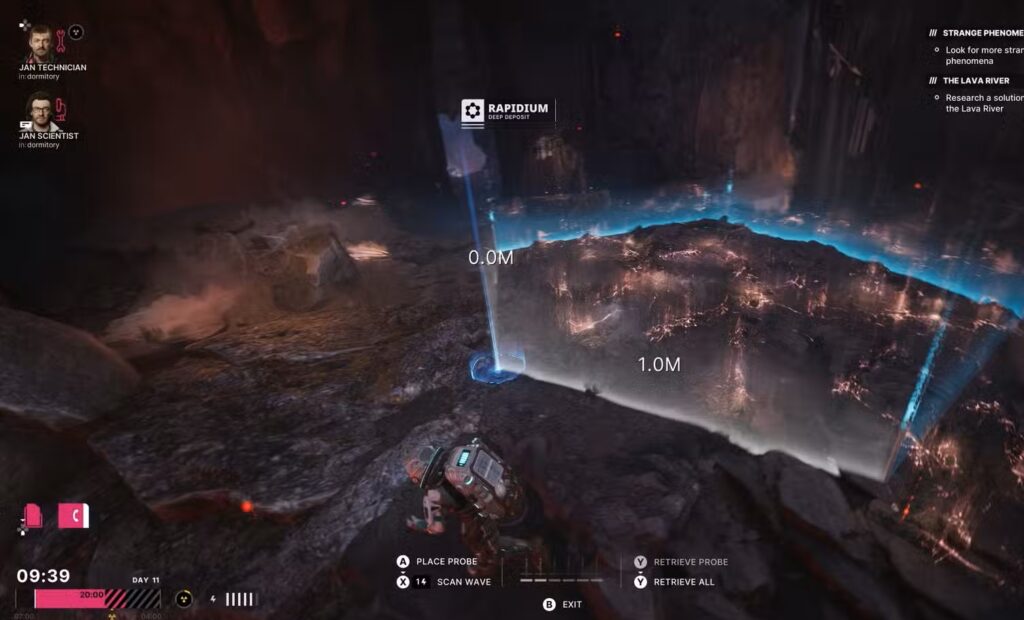
First, you need to figure out where the deep deposit is within the general area the game marks out. To do that, use the Polygonal Scanner, which you can access by opening the equipment wheel with LB/L1.
Once you’ve selected it, you can place up to six probes on the ground. Each probe needs to be within 2.5 meters of another one, and all of them should connect to form a perimeter on the ground.
When set up properly, you’ll see contour lines show up. Press X/Square to release a scan wave (just make sure your suit has enough energy).
The wave will reveal the direction of the deep deposit from your starting probe.
Once you’ve found the exact location, press LB/L1 again, go to Building Mode on the equipment wheel, and place a mining outpost on the outlined circle on the ground.
Connecting the Mining Outpost to the Base
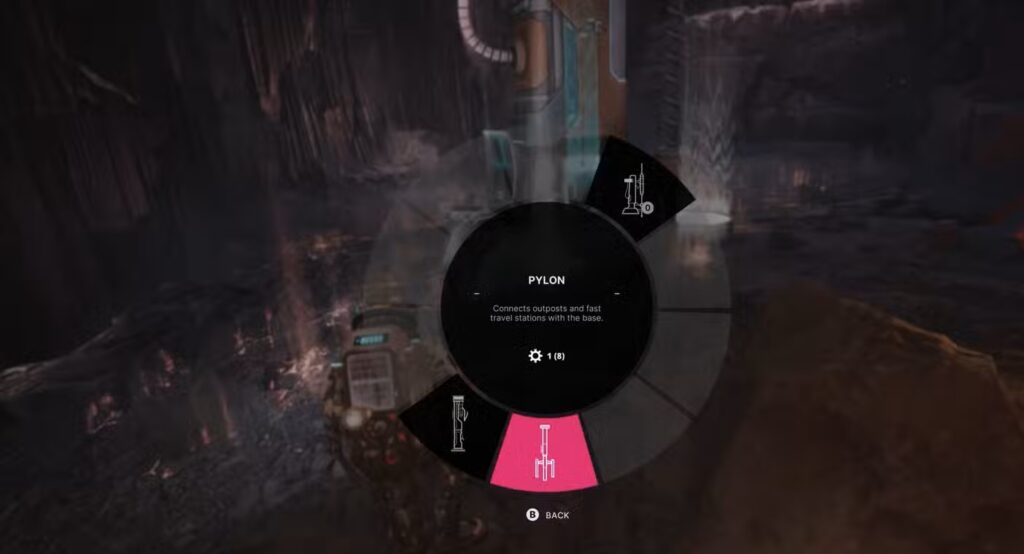
After the outpost is placed, the next step is connecting it to your base using pylons. You’ll find them in Building Mode as well. Start heading back toward your base, placing a pylon whenever the number above its placement outline gets into the low single digits.
Each pylon can be placed up to 40 meters away from the last one or from whatever you’re connecting to (the outpost or base). Once the final pylon reaches your base, everything’s linked up and ready to go.
Bonus: Once an outpost is connected, you can fast travel to it using the terminal on its side. That same terminal can also recharge your suit, which is super helpful since tools like the Polygonal Scanner use up a lot of energy.
Extracting Organics and Other Materials

Now that everything’s set up, it’s time to start collecting. This part tripped me up at first because the game isn’t super clear—you have to manually activate extraction.
Go to the outpost and interact with the screen on its front. A small pink circle will start filling up, and a countdown timer will kick in.
Once the cycle completes, you’ll get a small batch of whatever material you’re mining.
To make this process hands-free, you can assign one of your Alters to the mining outpost using the Assignments screen.
They’ll keep extracting materials for as long as you leave them there. You can always unassign them later if needed.
And that’s it. With this system running, you’ll have a steady stream of resources flowing in—from organics to metals and beyond.
Just keep an eye on your suit energy and manage your Alters, and you’ll have everything you need to build out your base and gear up in The Alters.